Week 1
No new assignments will be given this week.
Your objective, this week, is to complete and publish missing assignments.
Your objective, this week, is to complete and publish missing assignments.
Week 2
Let's discuss how to continue learning digital photography related skills in the coming weeks.
I will post all assignments to Schoology by Sunday at midnight. On Monday or when your class is scheduled, according to the Distance Learning Schedule, Log into Schoology and complete the assignment for that week. Contact me with your questions at anytime by email and I'll get back to you as soon as possible.
Alternative Project: If you are a self-motived learner and have good time management skills you might want to design your own project. If this sounds interesting go to Schoology and look for the "Design Your Own Distance Learning Project" assignment.
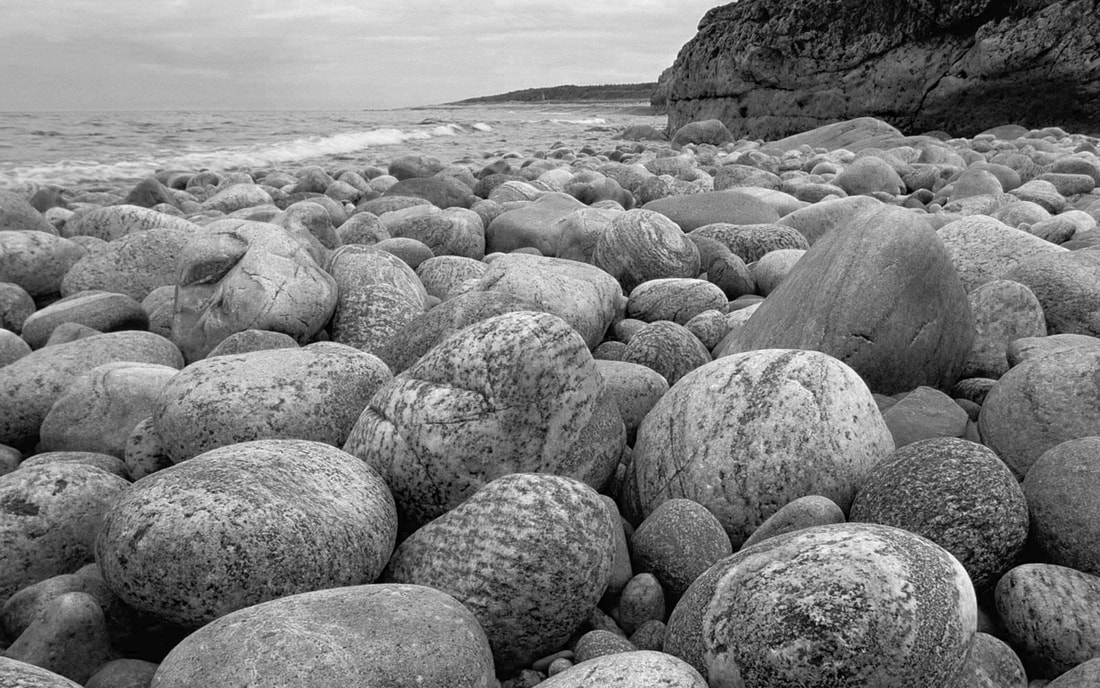
Week 3 - Photographing Texture
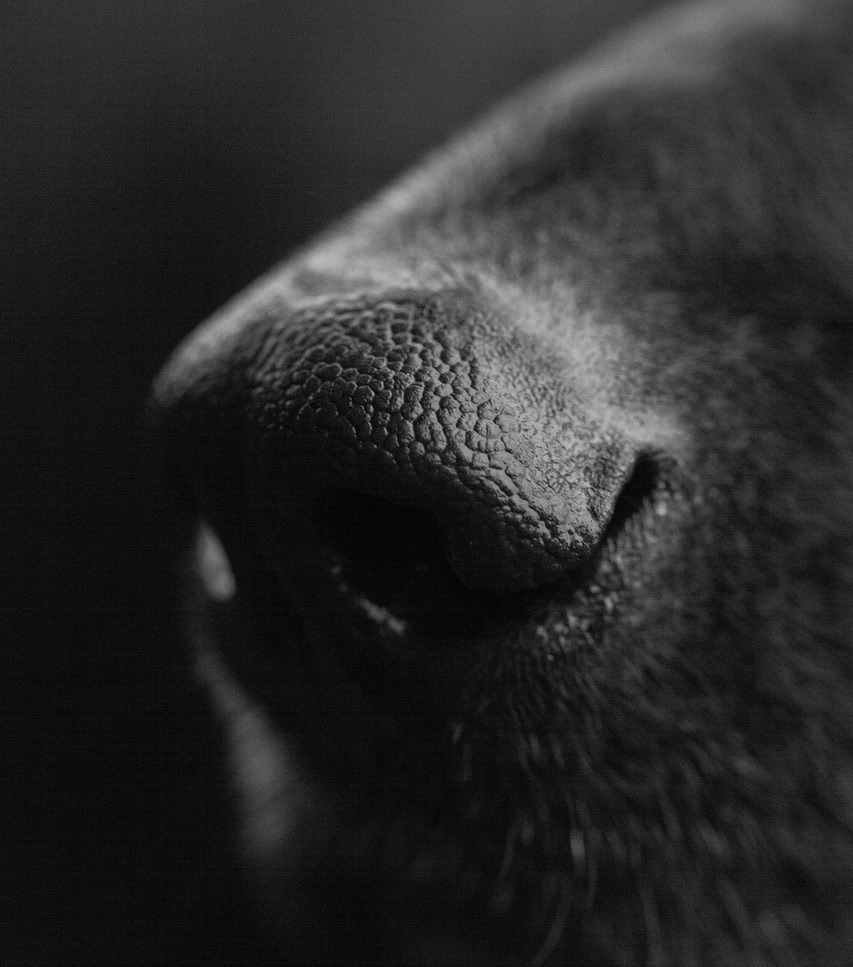
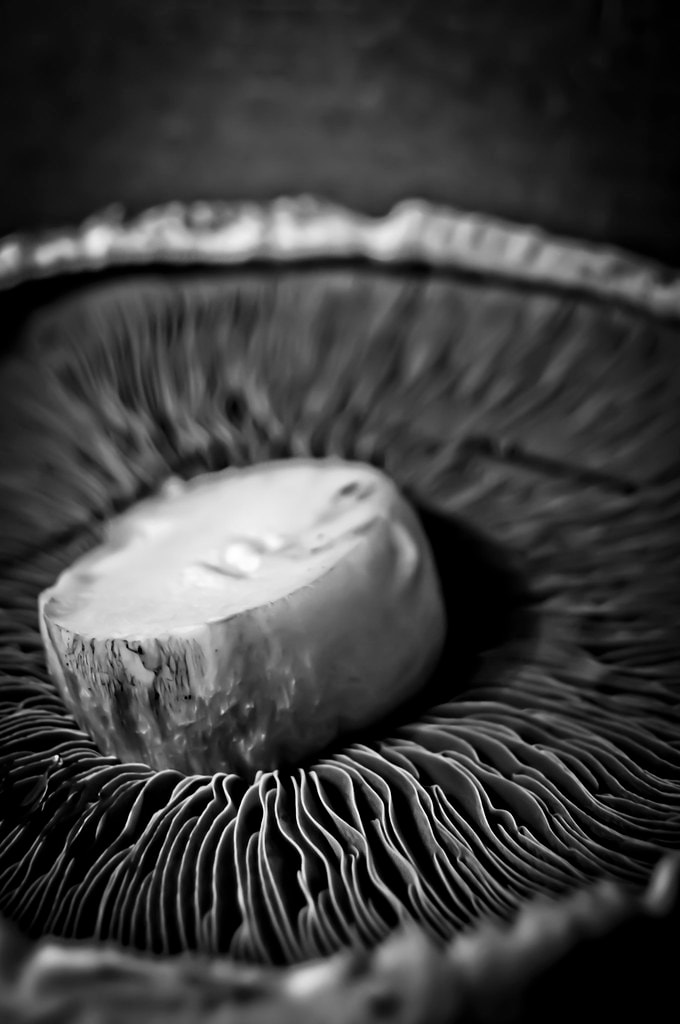

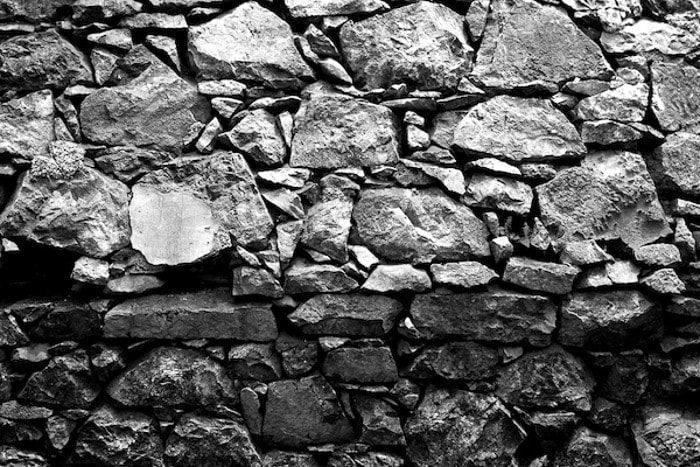
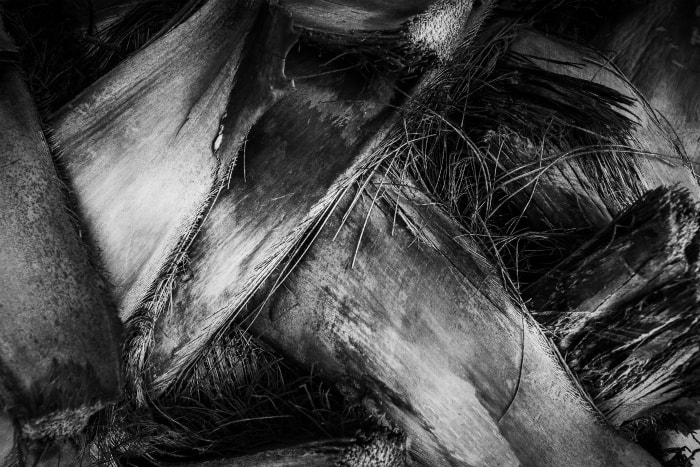
In this assignment, you will take 6 black and white photographs that demonstrate 6 different textures. You will learn how to capture texture by reading the article in the link below. If you have any questions at all about this assignment just send me an email and I'll get back to you as soon as possible.
1. Read the article in the link below.
2. Take 6 photographs of 6 different textures.
3. Convert photos to Black and White using any free app.
4. Publish the 6 photos to your Weebly website. Label this assignment Texture Skills Exercise.
5. Caption each photograph with a description explaining which of the 6 ways from the article did you use.
Read this article.
Week 4 - Photographing Texture & Narrative
Objective: In this assignment you have two objectives, texture and narrative. You will continue to photograph texture, but texture is only half of the assignment. The other objective is to create a narrative (tell a story). Take 2 photographs (one close-up texture and one narrative with texture) of 4 different objects. You will have a total of eight photographs, two for each texture.
Instructions:
Take photographs - Take two photographs each of 4 different objects with different textures. The first photograph will be a close-up shot that focuses on just the texture, like last week's assignment. The texture should be the focal point, in an abstract manner. The second photograph will be the same texture, but should include more information in the shot. You're trying to create a narrative or story. Texture is the focal point, but by including depth or objects you can start to communicate more than just texture and form a narrative.
Convert to B&W - Convert all photos to black and white using any free app.
Post to Weebly - Post your photographs to your Depth and Dimension page on Weebly.
Write Descriptions - Write a description for each of the narrative photographs. Describe how each photo tells a story. Also, write a critique of your work. Explain whether or not you think your photographs are a success.
Here are some examples:
|
Example 1:
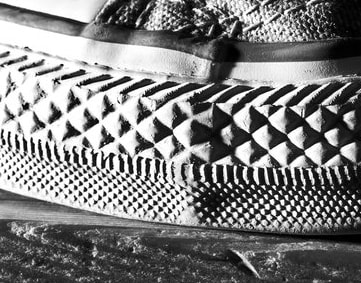
Photo 1: Texture is the focal point. I zoomed in so close, the photo starts to become abstract. |
|
|
Photo 2: Here is the same texture, but I backed away from the object to include more information.
Texture is still important, but there are more details. The focal point is now the texture on the sneaker. Someone is wearing the sneaker. It looks like someone is walking on a piece of wood or wood floor. This photograph tells a story. |

|
|
Example 2:
Photo 1: Here is a close-up shot of texture on a post. Texture is the focal point. I zoomed in so close, the photo starts to become abstract. |
|
|
Photo 2: Here is the same texture, but I backed away from the object to include more information. Texture is still important, but it's one part of the whole story. The focal point is now the texture on a fence post. Where is this fence post? At a school or other red brick building surrounded by trees. This photo communicates more than texture. This is a narrative.
|

|
Examples 3 & 4

Week 5 - Week 10
Welcome to Week 5 of Distance Learning. Some of you are doing a great job transitioning to distance learning, but many are still adjusting to the new routine. To make it easier for everyone to earn credit this semester I'm changing things up.
Starting Monday, April 27th everyone will be in charge of their project-based learning. Project-based learning is what we do in visual arts. We learn new skills, techniques, and materials through projects. I want you to think of this class as a general art course. Each week you need to work on a visual art project and post it to Schoology. You decide the project based on the equipment, materials, and supplies you have at home. You decide how much time you can devote to the art project based on your home schedule. I'd like you to strive for 30 minutes per week. That's it! Easy!
You have to post your work to Schoology to earn credit. You can publish your work to Weebly if you'd like, but you have to let me know in Schoology that you put the work on Weebly.
I'm sorry but I can't give you credit if you don't do the work. I think I've made this as easy as possible for all of you to pass the semester, but if you think this is still too hard, TALK TO ME. My email is [email protected]. Send me an email at any time with any questions, or if you need suggestions for a project. I'll get back to you as soon as possible.
You have 3 options for projects.
1. Design Your Own Distance Learning Projects (see the form below). You can do ANY ART related project (sculpture from recycled materials/clay/, painting with acrylics/watercolor, drawing with pencils/pens/ink, doodles, nature art, photography, anime, comics, digital drawing on iPad,
2. Choose from the B&W Photography lessons on my Weebly website - GMHSART.weebly.com.
3. You now have access to Photoshop at home, if you have a computer. Learn more about Photoshop by following online tutorials. I've listed below two of my favorite Photoshop teachers on Youtube.
Each week you will need to upload your project to Schoology by Friday (of that week).
Remember, even though I am not in the classroom with you, I am here for you. Please reach out to me via school email [email protected] with any of your questions.
| designyourownproject30.docx |
